Enchiladas Especiales Tacuba Style
Our recent trip to Chicago made me think of our meal at Bayless’ Frontera Grill last year and was the perfect reminder that it was about time to try out one of his recipes that I’ve had bookmarked and forgotten about. I’ve made and tasted my fair share of enchiladas, but this version is completely different from any other. The roux-based sauce was the star here and was basically a white sauce flavored with the subtle heat of fresh poblanos. It was so thick it covered the otherwise simple enchiladas in a blanket of the creamiest, richest, and most decadent sauce ever. And thanks to the toasting of the corn tortillas pre-assembly the individual rolls held their shape and helped make this a pretty dish as well–a nice little added plus.
Enchiladas Especiales Tacuba Style
from Rick Bayless
- 2 fresh poblano chiles
- 1 cup (lightly packed) roughly chopped spinach leaves
- 2 cups milk
- 2 cups chicken broth
- 6 tablespoons (3 ounces) butter—or you can use vegetable oil
- 3 garlic cloves, peeled and finely chopped
- 1/2 cup flour
- Salt
- 3 cups coarsely shredded cooked chicken (I used a rotisserie chicken)
- 12 corn tortillas
- A little vegetable oil for brushing or spraying
- About 1 cup Mexican melting cheese (I used Chihuahua) or Monterey Jack, brick or mild cheddar
- A little chopped cilantro for garnish
2) In a medium (3-quart) saucepan, combine the milk and broth, set over medium-low heat to warm.
3) In a large (4-quart) saucepan, melt the butter (or heat the oil) over medium. Add the garlic and cook for a minute to release its aroma, then add the flour and stir the mixture for a minute. Raise the heat to medium-high. Pour in the warm broth mixture and whisk constantly until the sauce boils. Reduce the heat to medium and simmer for 5 minutes. Remove from the heat.
4) Pour half the hot sauce into the blender with the chiles and spinach. Cover loosely and blend until smooth. Pour the mixture back into the saucepan with the remaining sauce. Taste and season with salt, usually about 2 teaspoons.
5) Heat the oven to 350 degrees. Smear about 1 cup of the sauce over the bottom of a 13×9-inch baking dish. Stir 1 cup of the sauce into the chicken.
6) Lay half of the tortillas out on a baking sheet and lightly brush or spray both sides of the tortillas with oil; top each tortilla with another one and brush or spray those with oil. Bake just to warm through and soften, about 3 minutes. Stack the tortillas and cover with a towel to keep warm.
7) Working quickly so that the tortillas stay hot and pliable, roll a portion of the chicken up in each tortilla, then line them all up in the baking dish(es). Douse evenly with the remaining sauce and sprinkle with the cheese.
8 ) Bake until the enchiladas are hot through (the cheese will have begun to brown), about 20 minutes. Garnish with the cilantro and serve without hesitation.
graham elliot
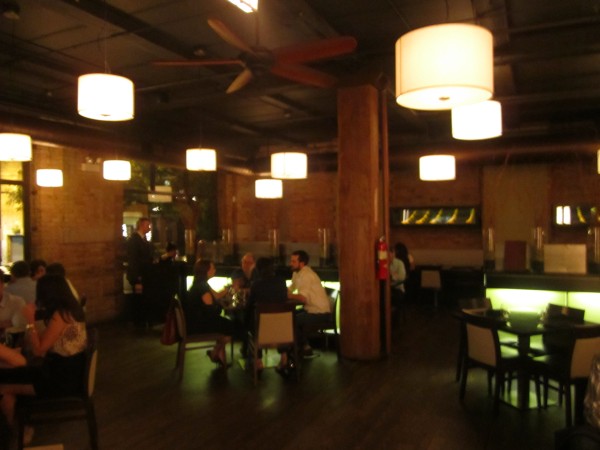
We celebrated the Fourth of July weekend in Chicago and shared a wonderful evening with Ben’s brother and his wife at graham elliot on Saturday night. Described as Chicago’s first ‘bistronomic’ restaurant, the philosophy here is high quality gourmet food served and enjoyed in a more casual and relaxed setting. From my impression of the website, I was expecting the restaurant to be packed and very loud and was pleasantly surprised by how vibrant and busy it was without being overly chaotic. The decor and table settings were very minimalistic and the dining room was large and spacious. Exposed brick and dim lights further contributed to the laid-back atmosphere.
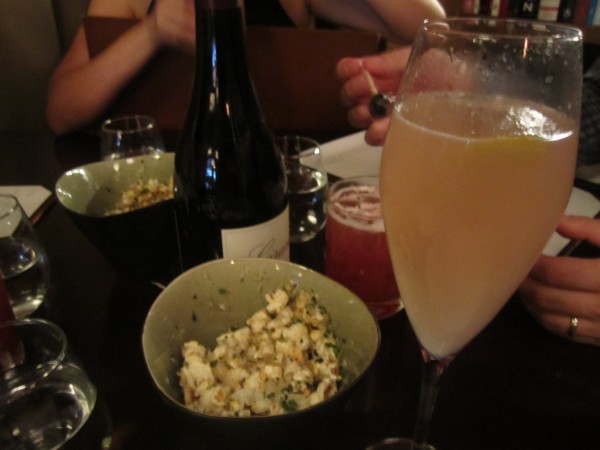
Soon after being seated, we were brought some peppered popcorn dressed up with truffle butter and parmesan and ordered a round of cocktails. This was a fantastic take on snackfood–salty and nicely infused with the truffle oil, it whet our appetites and went great with our drinks. I think I ordered the girliest cocktail on the menu–the pillow talk–and would highly recommend it to any fans of sparkling wine out there. Composed of vodka, elderflower liqueur, and sparkling wine, it was bubbly but most importantly not too sweet.
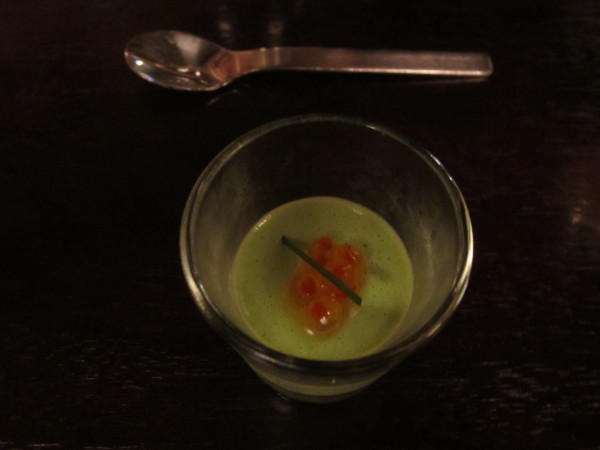
We started with an amouse bouche of chive panna cotta topped with caviar. The panna cotta had a nice creamy texture and was very earthy. On its own it would have been overwhelmingly ‘green’ but was balanced out by the saltiness of the roe.
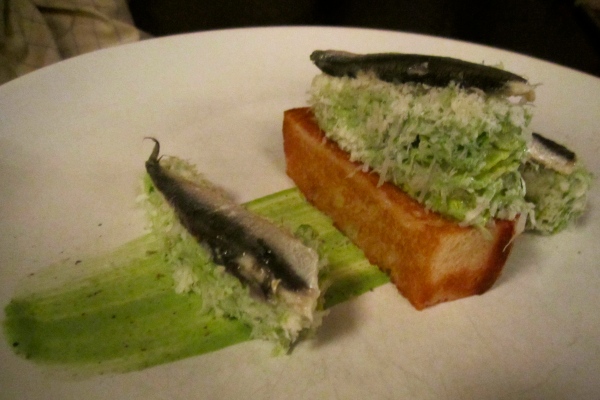
We decided against the tasting menu since we wanted to sample a few more of their dishes without being overloaded with the experience or the repertoire. It was recommended that we order two smaller dishes from the ‘cold’ or ‘hot’ menu and one larger item from the ‘sea’ or ‘land’ menu. One of the early favorites was the deconstructed caesar. Beautifully composed, the gem lettuce sat on top of a mascarpone filled brioche twinkie and was finished off with parmesan fluff and a few spanish anchovies. This signature dish lived up to its reputation and the brioche twinkie was pretty incredible.
I chose the charred octopus as my starter, served with preserved turnips, liquid olive, smoked potato and cured orange. I love the texture of octopus and enjoyed the smokey and acidic flavors here. I was also charmed by the liquid olives decorating the dish and was happy with my choice, but the overall consensus of the table was that this was the least interesting dish of the evening.
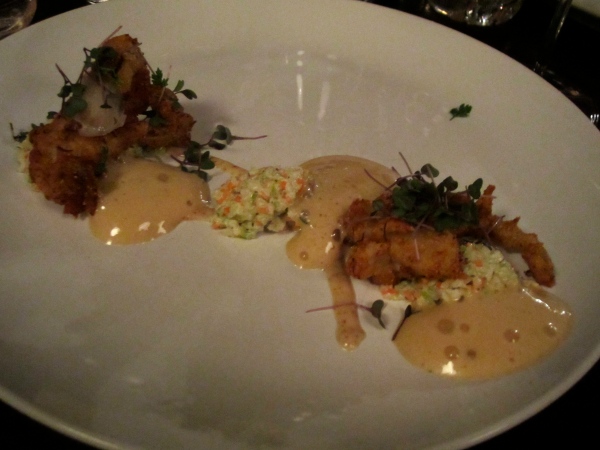
For round two, I chose the crab cake–battered soft shell crab with old bay was served with kohlrabi slaw and celery gel cubes. Beautifully presented, and every mouthful had a perfectly crispy morsel of nicely seasoned crab.
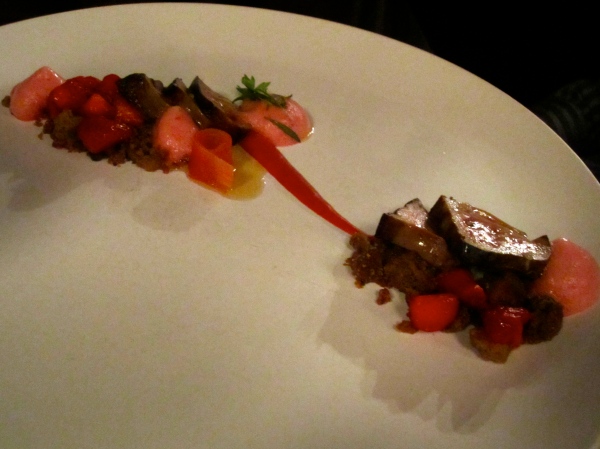
Our love of foie gras is well documented, so it’s no surprise this next dish was highly anticipated. Slices of seared foie were served with compressed rhubard, wild strawberry, caraway crumble and candied angelica. Tasting like fruit pie, this dish certainly did confuse my taste buds at first. The more bites I took, the more I appreciated how the sweetness and tartness of the rhubarb and strawberry cut the fattiness of the foie and how the crumble added the right amount of crunch. A memorable and gorgeously presented dish.
Worthy of a close up.
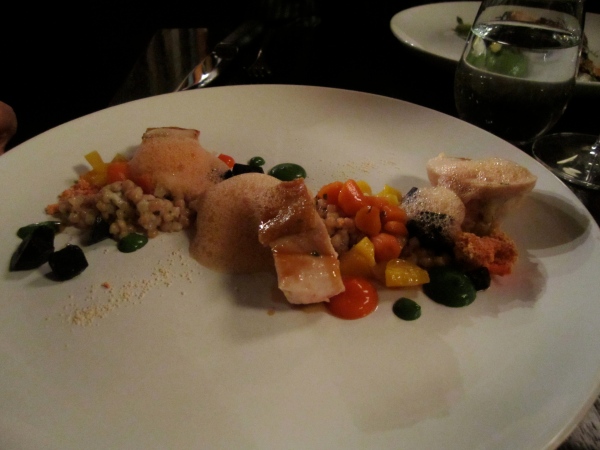
Now onto the land and sea main dishes. I got the atlantic swordfish with cannellini bean, saffron infusion, fennel ratatouille and razor clam. In contrast to my previous experiences with swordfish, this version had the most incredible texture and the flavors were robust. The fish was so tender that for a second I thought I was eating giant scallops. I enjoyed just about everything about it–the saffron infusion, the creamy sauce and the fennel all came together in this stellar dish that was my favorite of the evening.

I have to admit I was expecting the veal loin with royal trumpet, sweetbread schnitzel, mustard caviar and white asparagus to be the hit of the night. Having so many ingredients, the dish was put together meticulously, but there was just too much going on. The veal was cooked perfectly but it was taken over by the other superfluous ingredients, which made it less successful.

The last large dish was the jidori chicken served with israeli couscous, baby carrot, granulated honey, and chamomile sauce. I was a bit stuffed at this point so only had one bite…I was surprised by how juicy and tender the meat was and could not believe it was actually chicken.
For dessert, we had to try the chocolate framboise–a rich base of jivars ganache was topped with manjari cremeux, decorated with coffee earth and sprinkled with ancho chili. This was intensely full of chocolate flavors, which were only enhanced by the flavor and crunch of the coffee earth.

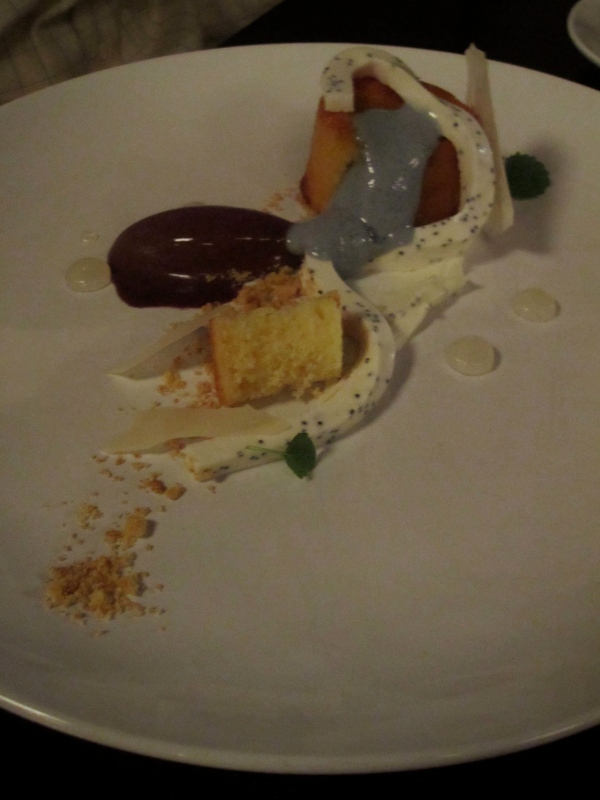
The last dish we tried was the lemon cake served with citrus curd, blueberry gelato, poppy ribbon and violet foam. This dessert was a lot more playful than the first and the blueberry gelato sticks out for me as being the highlight here. I was also fascinated by the poppy ribbon and while it was very subtle in flavor it added a unique texture that kept drawing me back for more.
I thought it was smart that the menu featured a range of dishes, from creative interpretations of classics that were sure to please most palettes to experimental ones that pushed the envelope a bit and challenged preconceived notions. We enjoyed how unpretentious the atmosphere was and would be happy to return and check out the changing menu.
Chocolate Whiskey Cupcakes
Cream cheese frosting has some serious competition now that I’ve discovered this buttercream. I think technically this is the French buttercream variety and it’s made by beating a mixture of eggs and egg yolks, whipping sugar syrup that has reached soft ball stage into it, and then adding a whole bunch of butter. Magically, it’s rich and creamy while being smooth and light at the same time. And this particular version has booze whipped into it–and you really can’t go wrong with that. I made these for Ben because I knew he’d really appreciate the whiskey, but I never imagined that I’d like them so much. I’m definitely not a fan of whiskey but a subtle hint of it I can handle and I was really surprised with how well it went with the chocolate cake. These were definitely one of the most gourmet cupcakes I’ve made and now there’s a whole new realm of buttercream I get to experiment with in my future baking endeavors.
Chocolate Whiskey Cupcakes
from Annie’s Eats
Ingredients:
For the cupcakes:
- 1 cup unsweetened cocoa powder
- 2 tsp. espresso powder
- 1 cup boiling water
- ½ cup sour cream
- 2 tsp. vanilla extract
- 1¼ cups all-purpose flour
- ¾ tsp. baking soda
- ½ tsp. salt
- 16 tbsp. unsalted butter, at room temperature
- 1¾ cups sugar
- 2 large eggs
For the whiskey simple syrup:
- ½ cup water
- ½ cup sugar
- 2 tbsp. whiskey
For the frosting:
- 2 large eggs, at room temperature
- 2 large egg yolks, at room temperature
- ¼ cup water
- 1 cup sugar
- 3 sticks (18 tbsp.) unsalted butter, at room temperature
- Pinch of salt
- 3-4 tbsp. whiskey
Preheat the oven to 350˚ F. Line two cupcake pans with paper liners (24 total).
1) Combine the cocoa powder and espresso powder in a small bowl. Add the boiling water and whisk until the mixture is smooth. Set aside and let cool to room temperature. Once cool, whisk in the sour cream and vanilla extract.
2) Combine the flour, baking soda and salt in a small bowl. Stir together with a fork to combine; set aside.
3) In the bowl of a stand mixer fitted with the paddle attachment, combine the butter and sugar. Beat on medium-high speed until light and fluffy, 3-5 minutes.
4) Beat in the eggs 1 at a time, beating well after each addition and scraping down the bowl as needed.
5) With the mixer on low speed, mix in the dry ingredients in three additions, alternately with the cocoa-sour cream mixture, beginning and ending with the dry ingredients. Beat each addition just until incorporated.
6) Divide the batter evenly between the prepared cupcake liners.
7) Bake 18-20 minutes, until a toothpick inserted in the center comes out clean. Let cool in the pan 5-10 minutes, then transfer to a wire rack to cool completely.
8 )For the simple syrup, combine the water and sugar in a small saucepan. Heat over medium-high heat, stirring occasionally, until the mixture is warm and the sugar has dissolved. Remove from the heat and stir in the whiskey. Set aside and let cool until ready to use.
9) To make the frosting, combine the eggs and egg yolks in the bowl of a stand mixer fitted with the whisk attachment. Whisk on high speed about 5 minutes.
11) Meanwhile, in a small saucepan, combine the water and sugar. Heat, stirring frequently, until it reaches the soft-ball stage, 234˚-239˚ F. Immediately transfer the sugar syrup to a liquid measuring cup.
12) With the mixture on low speed, add the sugar mixture to the egg mixture in a slow, thin stream. Increase the speed to medium and beat about 7 minutes, until the syrup has cooled and the bowl is just barely warm to the touch.
13) Add the butter 3-4 tablespoons at a time, beating well after each addition, at least 30 seconds. Once all of the butter has been added, continue to beat on medium speed until the frosting thickens slightly, 3-5 minutes.
14) Blend in the salt and whiskey.
15) Brush the cooled cupcakes with the whiskey syrup. Pipe the frosting onto the cupcakes using a pastry bag. Refrigerate until ready to serve.
Tomato Mozzarella Tart with Basil Garlic Crust
This tomato basil tart screams summertime and manages to capture the best and quintessential flavors of this wonderful season. First the star of the show: the tomatoes. Sweet and juicy, real summer tomatoes are something I look forward to all year long. As much as I enjoy eating them fresh on some toast with hummus, or drizzled with balsamic and olive oil in a caprese, the roasting here really concentrates the flavors and brings out even more of their sweetness. When you throw in some warm mozzarella, garlic, and basil, you end up with what some of the most classic and loved combinations of all time. I’m already planning on making several batches of this dough to keep in the freezer so I can easily make this anytime the craving strikes.
Basil-Garlic Tart Dough
from Ezra Pound Cake
- 1/3 cup fresh basil leaves
- 1 garlic clove
- 1 & 1/4 cups all purpose flour
- 1/2 tsp salt
- 1 stick unsalted butter, chilled cut into 1/2 inch cubes
- 4-5 Tbsp ice water
1) Place the basil and garlic in the work bowl of a food processor. Process, scraping down the sides of the bowl as needed, until finely chopped. Add flour and salt; pulse to combine.
2) Add butter. Pulse about 10 times, or until the mixture resembles pea-sized crumbs.
3) Add water, 1 tablespoon at a time, pulsing several times after each addition. After 4 tablespoons water have been added, process the dough for several seconds to see if the mixture forms a ball. If not, add remaining water. Process until dough forms into a ball. Remove dough from processor.
4) Flatten the dough into a 5-inch disk. Wrap it in plastic, and refrigerate for at least 1 hour. (The dough can be placed in a zipper-lock plastic bag and refrigerated for several days or frozen for 1 month. If frozen, defrost the dough in the refrigerator.)
5) Roll out the dough on a lightly floured surface into a 12-inch circle. Lay the dough over the tart pan, and press it into the pan.
[optional: not part of the recipe, but I decided to pre-bake my crust like I normally do with my quiches and pies:]
6) Preheat oven to 400F. Butter a large square of foil and press (butter side down) onto crust. Fill with pie weights or dried beans. Bake 20 minutes.
9) Remove foil and weights. Pierce bottom of crust all around. Bake another 10 minutes till golden. (can make this up to 6hrs ahead) Let cool.
Once you have the dough, the rest of the work is just slicing, assembling, and baking:
Tomato Mozzarella Tart
- 1 recipe basil-garlic tart dough
- 8 oz sliced mozzarella
- 2 large, ripe tomatoes (about 1 pound), cored and cut into thin slices (crosswise would probably be prettier)
- salt & pepper
- 1 Tbsp extra virgin olive oil
Preheat the oven to 375 degrees F.
1) Line the bottom of the tart shell with mozzarella.
2) Arrange the tomatoes over the cheese in a ring around the edge of the tart and a second ring in the center. Sprinkle with salt and pepper. Drizzle with olive oil. (I also covered up the edges of the tart with aluminum foil while baking so the edges didn’t burn).
3) Bake until the crust is golden brown and the cheese has started to brown in spots, 35 to 40 minutes. Cool on a rack for at least 5 minutes before slicing.(The tart may be covered and kept at room temperature for 6 hours.
Broiled Asparagus
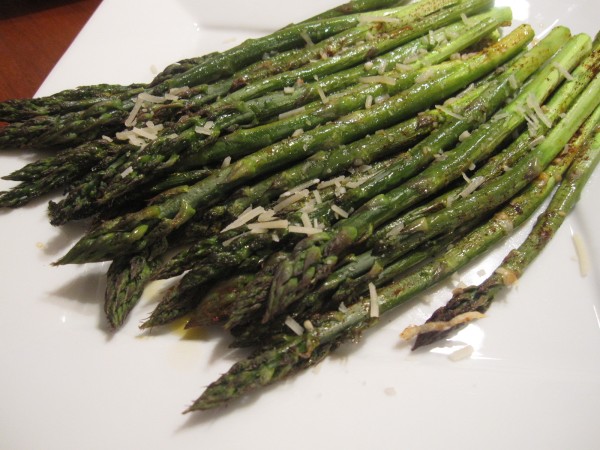
We just cannot get enough of this gorgeous asparagus and have been making our favorite side dish for dinner throughout the spring. Recently, I tried out Barefoot Contessa’s preparation, where she cuts off the woody stems and also uses her vegetable peeler to shave off the lower third of the remaining stems. At first I thought this would be an unnecessary step but it makes such a difference. The result is a crunchy asparagus that you can cleanly bite all the way through and isn’t at all tough and stringy. I’ve been tossing in olive oil and generously sprinkling the asparagus with Chipotle chile before broiling*, which gives it a little bit of heat and a very smoky flavor. After five minutes in the broiler, sprinkle with a bit of parmesan when it comes out. Sometimes I even forget about the main dish and just like to eat these alone like french fries!
*I know roasted asparagus sounds so much better than broiled, but this is not only much much faster but preserves the crunch that is lost from over roasting, so I’m sticking with it!
Thai Beef with Chiles & Basil over Coconut Rice
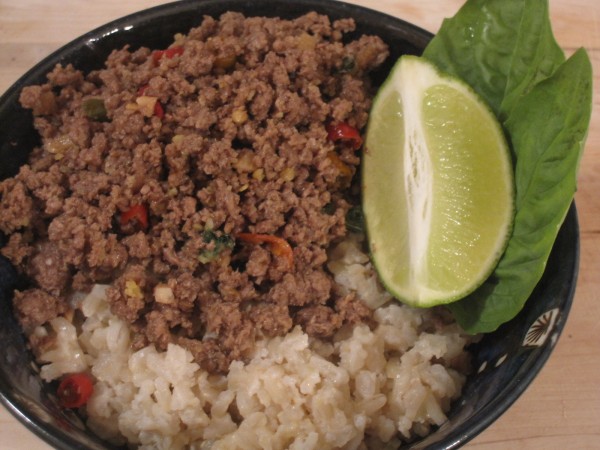
Ever since Hawaii I just haven’t been able to get enough Asian food. While in my fantasy world I’d totally eat sushi and poke everyday, in the real world meals like this one hit the spot without making me go bankrupt. I still can’t get over how much better this was than anything I’ve even had at any of the Thai places in St. Louis and how economical it was, even if you go all out and use high quality grass fed beef. This was one of those dishes I just kept on craving and made over and over…thankfully Ben forced me to stop so I didn’t overdo it and ruin a fantastic recipe for myself. You can experiment with the meat you use too–I like it best with beef, but when I’m less broke I’ll try using steak strips in place of ground beef to fancy it up a bit.
Thai Beef with Chiles & Basil over Coconut Rice
from Martha Stewart
- 1 1/4 cups brown or regular jasmine rice
- 1 can (13.5 ounces) coconut milk
- Coarse salt
- 2 tablespoons plus 1 teaspoon fish sauce
- 2 tablespoons plus 1 teaspoon soy sauce
- 1 teaspoon sugar
- 1 tablespoon vegetable oil
- 3 garlic cloves, chopped
- handful of thai chiles or 3 long hot peppers or red jalapeno chiles, seeded and sliced into 2-inch matchsticks
- 1 1/4 pounds ground beef sirloin
- 1 cup loosely packed torn fresh basil leaves
- Lime wedges, for serving
Veggie Soba Noodles
Wow the past few weeks have been a complete blur. While these pockets of intense work prevent me from spending much time making fun elaborate meals, they force me to add quick and easy dishes to my recipe collection–like these veggie sesame soba noodles. This might quite possibly be one of the most low maintenance meals and the fact that it’s packed with veggies and is super healthy is an added little bonus. And I wouldn’t be writing this if they didn’t come out tasting pretty amazing–I’m sure they’d be even better with some type of added protein, so feel free to add in your favorite.
Veggie Soba Noodles
from Tasty Kitchen Blog
For the dressing:
- ½ cup soy sauce
- 2 tbsp. sesame oil
- 2 tbsp. canola oil
- 2 tbsp. rice wine vinegar
- 2 cloves garlic, minced or pressed
- 4 green onions, chopped
- 1 1/2 tsp red pepper flakes
- ¼ cup cilantro, chopped
For the salad:
- 1 lb. soba noodles (or whole wheat pasta)
- 1 red bell pepper, seeded and sliced thin
- 1 cup shredded red cabbage
- 2 carrots, peeled and shredded
- 1½ cups edemame, shelled and cooked
- 1 zucchini sliced thinly into half moons, sauteed gently (optional)
- Toasted sesame seeds, for serving
1) Cook noodles according to directions. Drain and rinse with cold water.
2) For the dressing, whisk soy sauce, sesame oil, canola oil, vinegar, crushed pepper, garlic, green onions & cilantro in a large bowl.
3) Add noodles & vegetables, toss to coat.
4) Serve and sprinkle with sesame seeds.
John’s Pizzeria
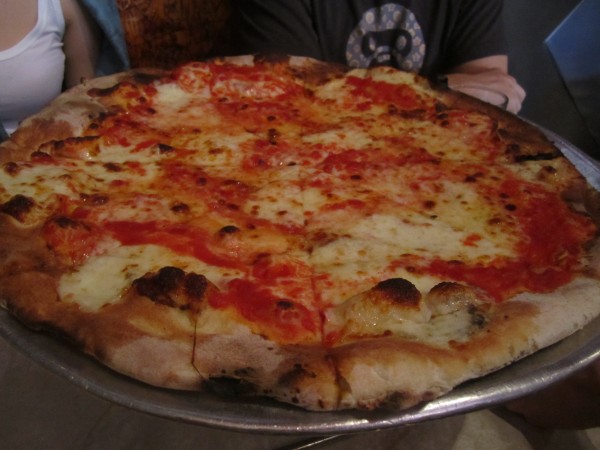
I’ve already written a review of John’s Pizza, so I won’t repeat myself too much, but have to say it remains one of my favorite pizzas of all time (and once upon a time I even made an effort to try them all–even going so far as dragging friends to the original Totino’s Coney Island location). There just isn’t anything like it anywhere else and the first bite reminds me why it’s so great–the paper thin crust, bright red tomato sauce nicely balanced with hot cheese that melts into it…absolute perfection in every bite and a place we come back to with almost every visit (and always the Bleecker location).
La Pizza & La Pasta @ Eataly
LIFE is Too Short Not to EAT WELL
A trip to NYC would not be complete without a stop at Eataly-Batali’s new-ish Italian marketplace scattered with a few mini-restaurants. At the end of a very long day, we decided to chill out and unwind at La Pizza/La Pasta. This particular restaurant is tucked away right behind the pasta section, providing a little bit more peace and quiet for those who are turned off by the crowds here. While it does get pretty busy and touristy, I still adore this place as well as their philosophy: “Life is too short not to eat well.” I love browsing through all the isles of specialty foods, admiring their fresh seafood section and charcuterie…and of course their huge selection of fresh mushrooms!
We ordered a Neapolitan-style pizza to get things started. Choosing the Salsicciotta, we couldn’t wait to see how the smoked provola cheese would go with the Neapolitan sausage, mushrooms, and fresh basil. While not being the biggest fan of the pizza at Otto, I wasn’t sure what to really expect here but the smokiness of the cheese went superbly well with the sausage. And while the crust was not perfectly thin and crispy, it wasn’t at all doughy or chewy and overall we were extremely pleased with it.
We also wanted to try out the pasta and went with the Pasta al Forno-al Ragu- a simple and traditional lasagne with Italian Ragu. While I wished there was a tiny bit more sauce on the noodles here, the pasta was cooked al dente and the dish was seasoned nicely and solidly done. Probably not the most memorable meal, but this was comfort food at its best.
While this time we didn’t visit the gelateria, the gelato here is some of the best and is definitely worth a try! They also just opened a rooftop beer garden that would definitely be on my list of things to check out.
One of the highlights—the [expensive but impressive] mushroom section!!
Bouchon Bakery
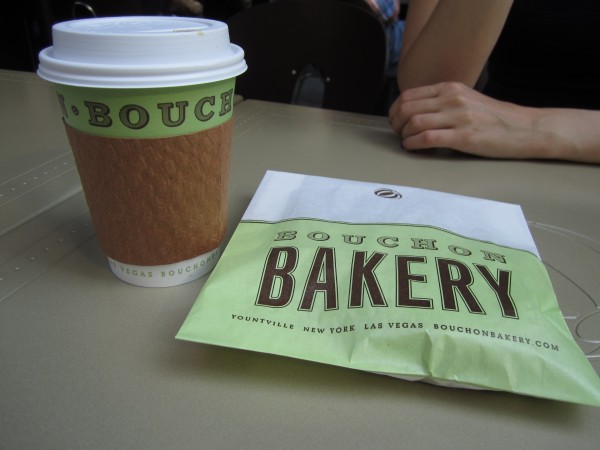
Since the whole winery hopping thing got in the way of restaurant hopping on our last trip to Napa, we couldn’t find enough time to make it to Keller’s Bouchon in Yountville. I had completely forgotten that there was even a NYC location until we luckily stumbled upon it after a tourist stop at the observation deck at 30 Rock. All that NYC walking had really tired us out and we were in major need of a caffeine and sugar fix and this was just the place for a quick recharge. The coffee was nice and strong and the macarons were some of the most gorgeous that I’ve ever seen–really almost too beautiful to eat. They were giant-almost the size of my whole palm, so we decided to split the pistachio flavored one. There was not one crack in the shell and they had the nice little feet that I have many times failed to replicate when baking these myself. Even better, there was just the right amount of crunch that gave way to a soft inside and a delicious buttercream filling–the overall effect being heavenly. Now I just wish I knew their secret to creating this perfect little confection!
View from the top of 30 Rock.


